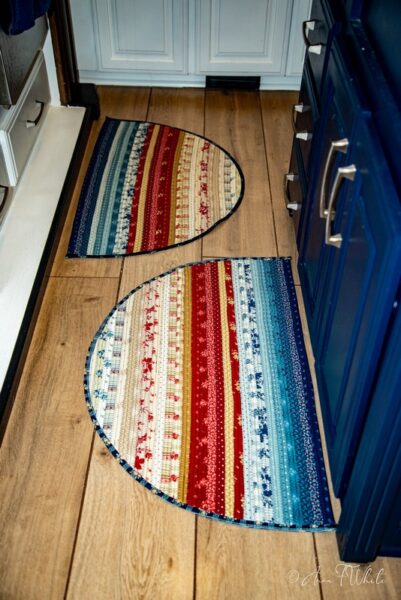
A few months back I made my first jelly roll rug in an oval shape and got real excited about the possibilities of this type of rug and wanted to try my hand at another version. I had two rugs in my kitchen that blended into the new floor as they were just about the same color so I knew this was the area I wanted to put my new rugs. The plan was to make two of the same color and design, a slice rug. It wasn't until after I completed the first one and put it on the floor that I got the epiphany that I should have made one rectangular rug as opposed to two slice rugs, but at this point it was too late.
The first step in this process was to decide how to lay out my 2 1/2" strips that would create my design. I purchased my supplies from Missouri Quilt, which included two jelly roll bundles and batting that included enough strips to create my two slice rugs and still have a few strips left to do another small rug or maybe a couple of pillows.
Each rug would take 29 strips. I got my idea from Shabby Fabrics after watching some of her videos on YouTube.
Close up of the strips, top half |
Close up of the strips, middle portion |
Close up of the strips, bottom portion |
Once I figured out my design, I cut each strip the length I needed based on the pattern I got from Shabby Fabrics, then it was time to clip the fabric strips to the batting. This is the most time consuming part, in my opinion. Depending on how many binder clips you have, you might have to sew some of the strips, then come back and clip some more until you are all done.
Once you have them all sewn together they will look something like this. I used the video to get my stitch length and other tips and would highly recommend watching this video as it will provide much better instructions than I can provide.
Once I had all the batting and strips sewn, it was time to sew all the strips together to make the rug. This is the fun part as you see your design take shape. As recommended in the video I sewed several rows together, steamed them and then connected them until I had them all together like this.
Once you have them all sewn together, you will use the pattern to cut off all the excess and get the following look.
At this point, the only thing left is to add the binding to the half circle part as the top does not need binding.
The finished product in my kitchen. Now it's time to get started on the second one.
UPDATE: 09.06.2020
I finished the second rug for in front of my sink. It is made with the exact same pattern as the first one with the only exception being the binding.
They look so good together. Now on to make a pillow using the leftover strips.