In mid February I started a quilt called, Paper Hearts Bee Dot, which uses one of Lori Holt's fabric lines, Bee Dot. The pattern, or in this case, the setting instructions are a free download from Fat Quarter Shop (FQS) online. Click here for instructions. In addition to the setting instructions, Kimberly with FQS put out a video on their YouTube channel showing how easy it is to make the blocks.
For this particular quilt, you use paper hearts, which can be found on FQS as Lori Holt 10" Heart Quilt Paper, #ST-33027.
On Kimberly's video, she gave helpful hints as to how you can get multiple cuts from one piece of paper instead of using the paper for every block you intend to make. This quilt calls for 80 blocks. Watching her video will be very helpful if you wish to complete this quilt; however, below I will try to demonstrate through my photos, the process I went through to create this masterpiece.
First step is to apply the paper to a piece a fabric by ironing it on.
Before you start cutting on the lines, stack a few pieces of blocks underneath. I cut 6 pieces per paper block. Your fabric blocks should be cut to 10" prior to making any cuts. You need a colored block versus a background block for each heart block you are making. I attempted to match my colors and backgrounds based on the way the pattern is laid out.
Follow the guidelines on the paper and cut right down the middle first.
Continue making your cuts according to the papers and cut the line that says, "cut second." I done this on both sides.
Here you can see the cut down the middle and then both the Left and Right side having the second cut.
Now I cut the remaining pieces on each the left and right sides based on what the instructions state as to third cut, fourth cut, etc.
At this point, you need to separate your fabrics to create the actual hearts you will begin sewing together.
You take the colored portion and group with background pieces and then take your background piece to make the heart section against the colored pieces to make the background. Sorry if this is confusing. Hopefully the photos will help to show what I mean.
I completed this process with all the fabric blocks and created a stack to begin sewing my actual heart blocks together.
You start by sewing piece L2 to L1.
Then that piece is sewn to L3.
After doing a couple of these I decided to do them in piecing mode. If you are not comfortable doing that, you can sew one at a time.
Piecing the next section.
More piecing.
Piecing makes me more productive.
Once I have L1, L2 and L3 sewn together, I ironed the seams in the same direction.
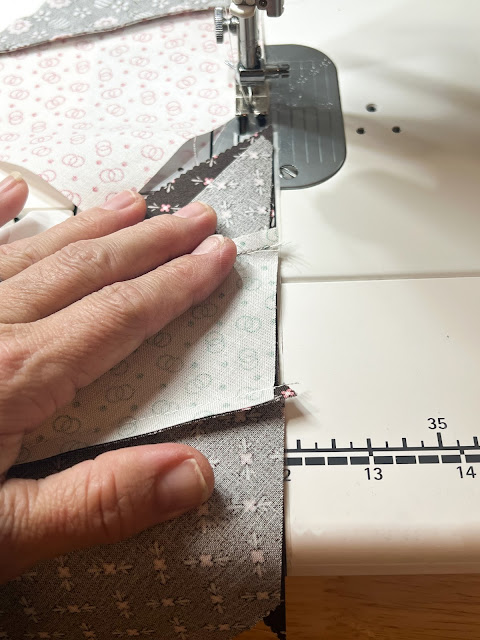
When you add the 4th section, you will have to figure out how much you will have overlapping the edge and you don't add point to point. Kimberly's video will help explain this section better.
Again, after sewing several together and getting the feel for what I am doing, I pieced several of these in a row.
After sewing on section 4, iron your seam to one side. I did not iron open seams on these.
My stacks with a left side and a right side. Now its time to sew the two together to create the block.
Before sewing my center seam to connect the left and right, I trimmed as shown below.
Once block is sewn, I pressed the center seam open.
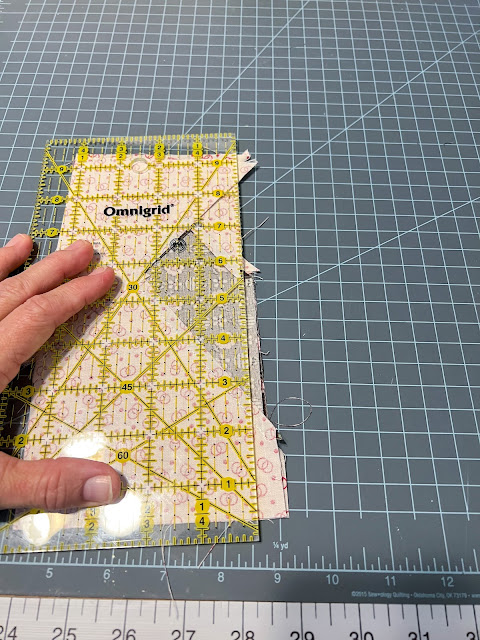
At this point, the entire block is trimmed down to 7 1/2". I lined up my ruler down the center and then tried to match the outside points at the 4" line.
Trimmed block
Several completed blocks
At this point I am sewing blocks together to create rows and then the rows are sewn together.
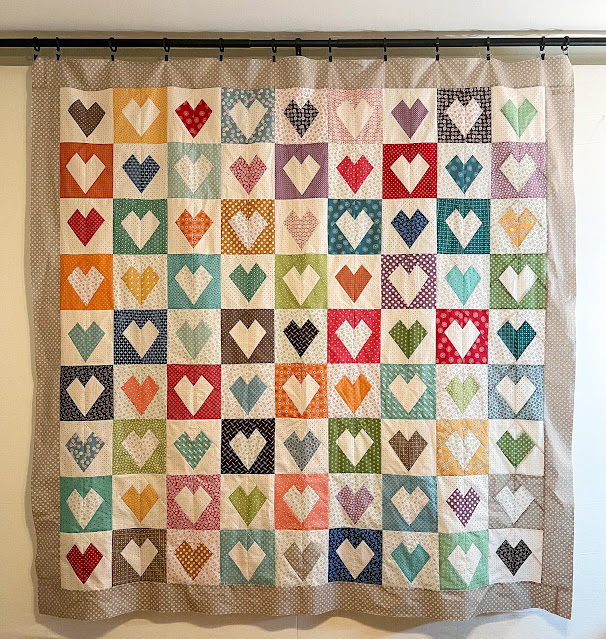
The completed quilt top. She is waiting to be quilted and is the next in line for Miss Moxie. If I can quit procrastinating I might get her quilted by the end of the year.


